Welcome to My Blog!

Welcome to my blog! I use my blog as a way to reflect, share, organize, and re-conceptualize my views as an educator. Enjoy and feel free to comment, post, disagree, and share your opinion. The more perspectives, the better!


Showing posts with label Beg Borrow Steal. Show all posts

Wednesday, August 15, 2012

Morning Meeting

I LOVE morning meeting. It is by far one my favorite part of the day. I love it; the kids love it; and I rarely have behavior problems. Morning Meeting is WAY more fun with 3rd graders. We actually get to do all four parts just about every day. For those of you who are unfamiliar, morning meeting has 4 parts:

Greeting
Share
Message
Activity

I pick a new greeting to share with my students every week. Last we did handshakes (hello important real world skill) and this week we are working on high fives. I will give you one guess about which one the kids like more. For the rest of this quarter my plan is to introduce a new greeting each week. As we learn them they will be put into a jar. After the first 9 weeks we will draw out of the jar for the greeting. I am also really looking forward to having my students teach us greetings in their native languages. My classroom has 6 different languages (not including English) spoken and the kids love to share about their native language.

The share can be anything. So far this year we have done class graphs, shared our starring me posters, read journal entries, and learned about our royal friend. I try to do at least one thing each week in which everyone shares, but on most days 3-5 students share and we celebrate their work with 3 claps or 2 snaps. Shares are usually voluntary/ by sign up and I make sure to tell my students in advance who will be sharing so those students can prepare. 

The message is a short letter to the students that I write each morning. I generally use it to go over the day's standards and schedule changes, visitors, etc. I am hoping to do some activities later in the year, but for now it is a quick way to give everyone a run-down of the day and practice some reading fluency. I also take questions about the day right after the message. 

The activity is some sort of game or small group activity. For example, today we were zookeepers who needed to compare the weight of the different animals we have at the zoo. I put the students into 5 groups of about 3-4 students and they sorted the animals by weight from least to greatest. I love tricking them into doing a little more math or reading! If you are a teacher interested in these cards you can download them here.

My favorite morning meeting moment of this week: "YOU like rollercoasters? Teachers don't like roller coasters!"

Saturday, August 4, 2012

Learning and Implementing School Wide PBS

This year my school has mandated that we move to a school wide PBS (positive behavior support) system. I really like the concept behind PBS, but admittedly I do have some reservations. There is a lot that goes into PBS and it has been challenging to implement a system that I am not yet fully trained on. So far I have introduced our school wide expectations (Be responsible, Be respectful, and Give your best effort), school-wide procedures and reward system. I am seeing good results with my students, and would probably see better results if I could remember to keep blue tickets with me.

Here is how I introduced the system to my students:

I started the discussion by talking about why we have rules and expectations (We have rules and expectations so everyone at our school can do their best learning). Then we did a group brainstorm about rules and expectations the students already knew. 

I then told the students that this year at our school there were three words, called expectations, that would help up us all do our best learning. Everyone, including teachers, will be working this year to meet these expectations. 

I introduced the the words responsible, respectful,and best effort. Then I gave a simple, kid friendly definition of each of them. I put up a synonymous word or phrase to help students remember the difference between the words (see below). 


Next we did a sort of procedures that would help make sure we are being responsible, respectful, and giving our best effort everywhere in the school. I modeled with classroom rules and then the students were broken up into groups to do sorts for the other areas of the school (bus, playground, cafeteria, restroom, arrival/ dismissal). 


After students presented their sorts to the class, I put the sorts up on a bulletin board under our key words (expectations). 


To end the lesson I had the students create a tri-fold and give an example of how they can show each expectation. 


Throughout this upcoming week I will be doing a series of character building activities and read alouds. At some point in each activity we will come back to our key expectations and talk about how our we (or the characters in our books) are/ are not demonstrating our expectations. I am looking forward to some great discussion with my students!

Thursday, August 2, 2012

Welcome to OUR Classroom!

The kids are here and I am officially making the transition from "my classroom" to "our classroom." I worked really hard to make our classroom student friendly. The only place in our room that is off limits to my students is behind my desk. The front and side of my desk will be shared with my students. The front of my desk plays host to our classroom shout out board and the top of my desk hosts pencils, tape, staplers and hole punches.  I have a ton of storage space and I am planning on labeling all of my cabinets so that my students will have easy access to what they need. One of the things I am already loving about my third graders in their level of independence. It has been really easy to teach them procedures so far b/c they have so much more school experience than my first graders did.

Here is a quick tour of my classroom:
View from my door. I have decided to do tables this year to maximize opportunities to practice English for my students. The white tubs are temporary. I put some books in them for the first day because I have not yet taught library procedures. On that note, check out my BEAUTIFUL library. I added 8 new boxes for chapter books and an additional box of Social Studies books for this upcoming year!

Back of the room: You are looking at my lockers, student mailboxes, homework board, milk crate shelves (holding tracking binders), guided reading table, and community supplies. The back cabinets are dedicated to CAFE and will eventually have different reading strategies that I teach. 

Front of the classroom: classroom expectations board (we are creating graphic organizers on the different expectations tomorrow to add to the board), big goals, daily objectives, calendar/helpers/class promise board, and another view of my library. On the side wall by the TV (the one you can't see) I have FIVE, yes FIVE, student computers!

Side Wall: "Great Work" wall is up top using clothes pins, alphabet strip, word wall, new vocabulary words, student lockers and turn in spot (on the easel so work stays in number orders). 

Close up of desk: The red and white binders are for student tracking, the purple books are science and social studies workbooks, the front of my desk is for students to write shoutouts, and the cart is filled with supplies I need to introduce to my students (math journals, agenda books, etc.)
And finally, my first assignment. I gave my students a chance to write me a question, something they want to learn in third grade, or something they want to do in third grade. After my students wrote, we discussed all of their questions and comments. The assignment generated a lot of great discussions. We talked about college, the Olympics, doing research, the diversity of our classroom (language and nationality), TCAP, monkeys, fish, and recess. My favorite student response is below. This is paper is a great reminder of how important it is to build concrete experiences into my math lessons before moving to abstract formulas and word problems.

"I want to learn math is sometimes its hard for me so I try to figer it out. But I can't so I use blocks for my hands. But if I get it wrong I use my head but sometimes I take it to recess."

Tuesday, April 17, 2012

Changing My Classroom Culture: Update

I have been working towards a better classroom culture for the past few weeks. I began the first few weeks with an intensive, 30min a day culture building block. I could not keep up the stamina of it, however, I have still be teaching 2-3 lessons a week. Some are read-alouds, some are discussions, and some are written scenarios.  So the big question is: Is it working? I wish I could say that my classroom was now all sunshine and rainbows, but it is not and I doubt it will ever be. This unit has definitely made a difference--not for the major challenges, but for some. It has helped give me a reference to talk about problems, reduced tattling, and helped give my students away to be advocates for themselves.

Over the summer I will post a full unit and resources, but for now, take a peek at some of the fun...


I think that I will begin this unit in the fall of next year. I did not go as in depth into community and culture building as I should have at the beginning of this year (first year teacher mistake #10000000001). I truly believe that if my students had more of the skills at the beginning of the year that I am teaching now there would have been far fewer fight, hurt feeling, and yelling (from the teacher).

Tuesday, February 14, 2012

Weekly Behavior Chart

Here is the link to a block-by-block behavior tracker I use with two of my students.  It was recommended by my school's literacy/ instructional coach and has made a huge difference in the behavior of the students I use it with.

These are both students who are very bright, but have a difficult time with my class-wide behavior system. They need more reminders to stay on track and this gives them a fresh-start several times a day. It also gives them the opportunity to earn daily and weekly rewards (neither student had been very successful at earning my weekly treasure chest reward).

The students keep their chart on a clipboard and after each lesson of the day take it out and record a "happy face" which means I needed 1-2 warnings or a "sad face" which means 3 or more warnings. A lot of times I will ask them how they think they did as a way to start a conversation about behavior.

The students each chose their own reward. Both chose a technology reward of 5 minutes on the computer and/or ipad at the end of the day.

The good, the bad, and the ugly

Ignore the awful cliche in the title, but I am too tired to be original. As I move farther from January I am trying to stay committed to my new year's resolutions (1. Make my bed every day, 2. Find a balance between work and the rest of my life, 3. become a more active blogger) which means forcing myself to blog in my unmade bed.

So here it goes:

The Good:
I have created a block-by-block behavior tracker that is working really well with some of my students. It gives them a fresh start at each block and both an immediate and weekly goal to work towards. It did not work well with my lower students, but has given some extra motivation to two of my bright, but difficult students.  It is available for download here: Weekly Behavior Chart.

The Bad:
Tomorrow during what will likely be a very intense parent-teacher conference I have to explain to a very traditional Muslim family what "the finger" means and why we can't give it in school. This is to the same family that came in distraught that their daughter had written that she "loved" a boy in her journal.

The Ugly:
My students made my sub cry on Friday. They misbehaved to the point that a 30 year veteran teacher and regular sub in our building was so upset that my principal had to come down to speak to my students on Friday afternoon. Today we wrote apology notes "I am sorry I _______. Next time I will do ______" instead of going to recess.

We also had a behavior meeting in which we discussed our rules for the 100 millionth time and created a consequence bubble map of consequences that can happen as a result of bad choices. Did it work? Maybe for 10 minutes! I am trying to stay optimistic and give my best every day, but the reality is that the conduct in my classroom (including my own) is not where I want it to be. My classroom environment is not conducive to the academic and social-emotional gains that I came into this year expecting to make. The reality is that I don't know what else to do other keep a mild chaos from turning into a down right destructive environment. I have done my best to apply what I learned in school, from TFA, from COMP training, and what I have read in my classroom management books. Right now I am looking into purchasing materials from the Love and Logic Institute which was recommended to me by my MTLD. Hopefully you will see and update about the wonderful results I am seeing!

The thing I should be mad about, but honestly find really funny.

Last week at lunch one of my students was sent to the office for "pleasuring" himself with a corn dog. The office didn't find it nearly as funny as I did.

Monday, January 9, 2012

It's all about the data: Semester Review

My first semester as a teacher ended right before winter break. Since I took the majority of winter break for relaxation, family, friends, and a very good football game, I am just now getting to really look at and analyze my data! The nerd in me REALLY loves looking at data so this is a fun post for me.

First up, my running record levels. Running Record Reading levels rule pretty much everything at my school (DIBELS and DEA coming in 2nd and 3rd respectively) so running records are always the first thing I look at. I use my running record levels to determine my guided reading groups, student partnering, seating and beginning next week my word study instruction. Here is a look at the reading growth my students have made:
Running Records Growth
TFA Benchmark Goals
I am proud of the progress my class has made, but there is definitely room to grow. I have a few all-star students who have grown over 10 levels so far and several students who are on pace to make at least a year's worth of growth. What worries me is that I have a few students who have shown little or no growth. 

My other major concern is that only 7 of my students (less than half of my class) are reading above the first grade benchmark for this time of year. This means that despite growth being made, they are still reading below a first grade level. One of my driving goals for this year is that my students will make 1.5 years of progress (or grow 15+ levels) so that they are adequately prepared for second grade. This is seeming like a long shot for many of my students which is really frustrating. 

Once I had the data I realized a few things. While I am proud of my progress (especially considering the amount of time during the first semester I had to spend on classroom management and routines), I have a lot of work to do if I am going to meet my Big Goals. The teaching methods I have been using need to be revamped.

I am spending to much time teaching to "the middle." The middle is typically a safe place to teach to, but if you look closely at my data you will see that my students are divided into "high" and "low" groups. The low group consists of students who are all under a level 5 reading level. Students are actually supposed to enter first grade on a level five so these are students who have not yet mastered kindergarten reading skills. When I teach to the middle I alienate these students or find myself asking them the lower-order questions so they can feel successful. My higher students are not being challenged enough and often answer questions so fast that they students who need to think about it cannot get a chance ("wait time" is difficult in a first grade classroom b/c inevitably someone will whisper of shout out the answer). 

With this divide in mind I have decided to revamp my schedule so that I am spending more time working with small groups of students who are working on specific skills. I have dedicated my math block every Wednesday to be an intervention hour. I will have my students playing math enrichment games, using an online program called https://www.xtramath.org/, and meeting with me in small groups. My table will be a combination of math re-teaching and hopefully also time to address some reading skills my students need. I am also going to try to work with some of the third and fourth grade teachers to have a few student volunteers in my classroom to help my students with AR testing and even tutoring a few students.

I am also going to divide my word study instruction into two ability level groups. As I was doing report cards I realized that my low group (the below 5s) did not pass a single spelling test this entire quarter so I am going to go back and re-teach some of these skills as well as do some vowel sound remediation with them. My higher group will start word study independently while I teach the low group. The word study routine is something these students have mastered so I think they will be able to handle it without the lesson first and then the two groups will switch. I built in a 3 minute transition time so that I can check the high group's work in between sessions. During this same time I have one student who will be going to a kindergarten classroom to get additional reading support and one student I have developed an independent word study lesson for.

This student is so high that even when among my other high readers she is not being challenged. So starting this week she will be going to a second grade classroom in the morning for reading and then during word study I have her set up on http://www.spellingcity.com/ with her own differentiated word list based on the Words Their Way spelling inventory. I have created a checklist so she can study independently and on Friday I can give her an online quiz. 

Click here for a copy of the differentiated spelling checklist. 

So begins a new 9 weeks. I am trying a LOT of new things. Right now my only concern is if I can handle the preparation and time involved with setting up so many new systems and procedures. It is a new year and for me it is really a "now or never" type of thing so ready or not, here I come!

Sunday, September 4, 2011

Morning Meeting and H3

I have been working hard to build a community with my 20 first graders. This has been especially difficult because of language barriers between the students who speak Spanish and those who do not speak Spanish and the constant change of students ( I gained 3 students from another class in week 2, switched 3 with another teacher in week 3, and had 2 students stop coming since the first day). There are two essential pieces of our day that without a fail all of the children get along and are kind to each other, thus they are my two favorite parts of my day!

Morning Meeting: While I have not yet had time to read THE Morning Meeting book, I have established a morning meeting routine that my students seem to really enjoy. Each morning after morning work and announcements, we form a circle around the carpet. Before I join the circle I read our morning message... something along the lines of

"Dear Rainbow Fish, What is your favorite color? Today we will do our journals, talk about characters in reading, and practice our numbers in math. After lunch we will practice our short -a words. At the end of the day we will go to P.E. We need to really work hard on our noise level today so we have more time to learn. Let's make it a great day! Love, Miss Prinzo"


After I read the message I sit down in the circle to start are morning handshake. I turn to the student on the left and say "Good morning_____." and shake their hand. They reply with, "Good morning Miss Prinzo" and then turn to their neighbor and repeat the process. Once the handshake gets back to my other side we say our morning chant (stolen from OASC ML mornings)

"G-O-O-D-M-O-R-N-I-N-G Good morning! Hey! Hey! Good morning! Whooo!"


Next we answer our morning question which sometimes has to do with academics and sometimes is more "get to know you" style. Right now I am trying to help my students use complete sentences (a Common Core Speaking and Listening standard that is particularly difficult for EL studnets). We use a big squishy  ball similar to this one (mine is purple).


We pass the ball in either clockwise circle (if I am in a bad mood or my students are not acting appropriately) or back and forth across the circle (if I am in a good mood and my students are behaving). When we pass it back and forth the procedure is that your hands go on your knees if you still need the ball or in your lap if you have already had a turn to answer the question.

After the morning question I give an overview of our daily schedule and then we do a transition to face the white board so I can teach my first lesson of the day.

H3: Hug, Handshake, or High Five
At the end of the day when we line up to leave the room for the last time, we have H3. My students LOVE this! One of my favorite professors suggested this to us during our Stories of Teaching Class as a way to ensure that every student has a positive end to his or her day. I like it as much as the students do! It is nice to know that no matter HOW MUCH they drive me crazy during our afternoons, we will end our day on good terms. H3 is super simple. I have this sign posted on my door:

Here is the download for it: H3

As the children leave they tell me if they want a hug, high five or handshake. This is a SERIOUS decision. Many of my students choose something different each day (although a few never change).

Monday, July 11, 2011

CH and SH sound unit

My students  have been really struggling with their first digraphs: the SH and CH sounds. This is the plan I created for the week to help them distinguish these sounds from other sounds and from each other. Today was the first day of teaching this unit and I loved the simplicity of it. Below you can find an overview of the unit and then I have linked to some of the resources I used. Many of the resources were borrowed so I cannot put them up until I have permission. Enjoy!


Objective for week: SWBAT spell, decode, and distinguish words with sh and ch digraphs

Materials for the week:
-          M,T,W,TH,F Do now worksheets
-          Picture cards and workmats for SH, CH, and “Other” word sorts
-          Dry erase boards/ markers
-          “Shelly’s Shell Shop” and “Chip the Chimp” from A to Z reader(7 copies)
-          Crayons and pencils
-          Chart paper “mad lib”
-          “Writing” paper for spelling test

DAILY AGENDA:
Monday
-          “Do Now” Trace and Write SH words by the pictures
-          INM: Reintroduce SH
o   Brainstorm SH words
-          GP: Do a picture/ word sort… Which pictures are SH words which pictures are not
-          IP: Circle SH words on a work sheet
o   RW 19, 20 Give “Shelly’s Shell Shop” and have them read it in pairs and when finished color SH words with a crayon
Tuesday:
-          “Do Now”  Fill in the sound SH words
-          INM: Reintroduce CH
o   Brainstorm CH words
-          GP: Do a picture/ word sort…which pictures are CH words and which are not
-          IP: Circle CH words on a worksheet
o   RW 19, 20 Give “Chip the Chimp” and have them read it in pairs and when finished color CH words with a crayon
Wednesday:
-          “Do Now” Write SH and CH words, underline the SH sounds and Circle the CH sounds
-          INM: Review on Sh and ch while focusing on the difference between the two words.
-          GP: Sort pictures between CH and SH categories
-          IP: Circle the correct sound for each picture

Thursday
-          “Do Now” Circle SH sounds and CH sounds
-          INM: Review SH and CH and do a quick word sort between the two sounds.
-          GP:  As a class we will write a CH/SH mad lib. I will create a frame for a story and students will volunteer words to put in our story.
-          IP: Students will complete picture sentence pages

Friday
-          “Do Now” Read SH and CH picture sentences from yesterday (with blanks filled in). Circle CH sounds and underline SH sounds.
-          INM: Review how to spell and say our sounds with other letters.
-          IP: Spelling test: ash, shop, she, chop, chin


Monday, July 4, 2011

DIY Dry Erase Boards

Thanks to one of my collab members, our students have awesome dry-erase boards to work on. The best part? We made a class set for under $10.

Materials:
- white poster board, cut into 8.5" x 11" sheets
- sheet protectors (don't be cheap...get the ones that are extra sturdy)
-felt
-dry erase markers (might put you over $10 if you buy good ones like EXPO or BIC)

Directions
1. cut poster board into 8.5" x 11" sheets
2. Slide in sheet protectors

- We cult pieces of felt into small pieces for erasers and then slipped an eraser and marker into each sheet protector. It makes for really easy distribution and clean-up.

The even better than best part? We can slide math and word-study worksheets into the sheet protectors and the students can have wipe off practice pages.

I am in so excited to make these for my classroom! Picture to come!


Wednesday, June 22, 2011

Awesome Literacy Resource

Our Literacy Specialist at Institute is AMAZING! She is very concise and has a lot of great strategies and ideas for teaching literacy explicitly. This is a more direct-instruction oriented model than I am used to, but I am beginning to see how her sessions fit into my ideal of a balanced literacy, workshop style classroom.

Here is a link to her Literacy Blog. She just started it, but it already has some awesome tools!

http://delta11lowerelit.wordpress.com/

Friday, June 3, 2011

Sharing Relay with my students

One of the things I have learned this year is that it is important to let the students get to know you. In my other practicum experiences I was very distant about my personal life with my students. I would answer questions when they came up, but I never really shared with them. We spend a lot of time learning about our students' lives so it only makes sense to help them get to know their teacher beyond the classroom as well. My mentor teacher really provided me with a good example of how to share her personal life with students while still maintaining a professional separation between school and home. Following her lead, I began to share more about myself with my students. One of the major aspects of my life outside of the classroom is volunteering with the American Cancer Society as an event chair of Relay For Life at the University of Cincinnati.

My initial, very ambitious plan, was to host a mini-Relay at Fairview so students could experience a Relay did not happen. I just didn't have the time or energy to put the plan into action. I did, however, work with the school to invite families to our event and I did a special art project with my students in honor of the Cancer Survivors at Relay For Life.

Though my students knew I volunteered with Relay, they did not really understand what it meant. Before the art project I spent a few minutes talking with my students, in first-grade terms, what the American Cancer Society was and how we were able to help. My mentor teacher and I really worked hard this year to help the students realize how their actions contribute to others' feelings. This activity was a perfect reinforcement because we were able to talk about how good the Survivors at Relay would feel knowing that 20 students were thinking about them and were willing to share their art work with them!

Using our Fun Friday time and X-group's Friday center time my students tissue-paper collaged over top of Relay logos, signature phrases, and (in conjunction with our theme) the word 'hope' written in all of the different languages children in our classroom speak (8!). We had a lot of fun using the tissue paper. I was really impressed that all of my students were engaged and not a single student asked if they could keep their artwork. After they finished tissue papering, I trimmed the pages, glued them onto black construction paper, and connected them to make a banner to hang at our Survivor dinner. It looked AMAZING:

Our banner hanging at Relay!

After the event I brought in pictures from the dinner to share with the students. They were so excited to know that their artwork was put up on a real college campus!

I am not going to lie, this project was probably more for me than the students. It was important for me to connect two of my biggest passions. It also helped me begin to brainstorm ways that children can contribute to their community without even leaving the classroom. This is something I hope to continue. Maybe a monthly or quarterly activity? I will have to think about it!

For those of you unfamiliar with Relay For Life visit our event page:http://main.acsevents.org/site/TR?pg=entry&fr_id=32694 or watch a video about what Relay For Life at UC is all about: 

Wednesday, May 11, 2011

Saying Thank You and Other Gestures of Appreciation Part 2

As I mentioned in the previous post, it is important to help students understand why, when and how we say thank you. Here are some ways we have said thank you (or have shown appreciation) this year:

(1) Learning to make and write thank you cards: We taught the students how to fold paper in half to make cards.  It seems simple, but it is a lesson in itself to show how to fold a card and where the "message" of the card goes. Once we learned how to make cards we made them for different occasions all year long.

(2) Field trips and presenters: We go on a lot of field trips and have several presenters throughout the year. We use this as an opportunity for children to use writing in a meaningful way. We typically write letters to these people.

(3) Shared writing: Thank you/ appreciation letter. Write letters and thank you's as a group. It is easy to incorporate sentence structure, vocabulary choice, and editing into a shared writing like this.

(4) Pictures: Take a picture of your students saying thanks! Have each child decorate a letter and hold it or make a banner to let the children decorate and take a class picture. We used this in our classroom for a get well soon message, thank you to our Fasching basket winner, and I even got a birthday card like this!

(5) Giant Card: Make a poster-sized card and let the children sign/ decorate. We used this idea to welcome our German teacher's new baby!

(7) Pick a name activity: one morning we had each child draw the name of another child in the class. They were instructed to write or draw something you like about the person they had drawn. We collected all of the notes/ pictures and sent them home in each child's morning folder. They LOVED it!

(8) Royal Friendship Book: In our classroom we pick a King or Queen each week. Throughout the week we learn about the child. Each Friday every student and teacher writes a letter to the king or queen. All of the letters are put into a book and presented to the king or queen at the end of the day. Note: we also use this as a regular writing assessment and make copies for documentation. This is especially helpful because it is a familiar process for the students each week.

Friday, April 1, 2011

Money Mania Part 2

I am sure you were on the edge of your seat, waiting anxiously to find out what happened with the rest of my Money unit. So here it is! Just a reminder, all of the worksheets I created can be found, downloaded, and edited at this link: https://docs.google.com/document/d/10su9dLXoWZ864pu-n_W61mFS9Cx9H_w1uAWTdlueI6E/edit?hl=en&authkey=CLGf3q0I 

A Strategy for Counting Money
I was initially very frustrated when thinking about how to teach money. My class had not covered double digit addition yet not had they covered addition of more than three digits, so how was I going to teach them how to add money??? I found this strategy through the TFA resource exchange and it worked really well for my students. The strategy shows students how to count money by drawing lines or "legs" based on how many "fives" each coin has. A quarter gets 5 lines (two arms, to legs, and a ponytail...just like Washington!), a dime gets 2 lines (two legs), and a nickel gets 1 line (like a lollipop). After you label the coin, then count by fives. Each time you count make a little cross over the coin (so they can keep track of where they were). After adding all the silver coins, count on with the pennies. I was amazed at how well the students responded to this method. We practiced it with plastic coins and our white boards first then translated it to paper images of coins.

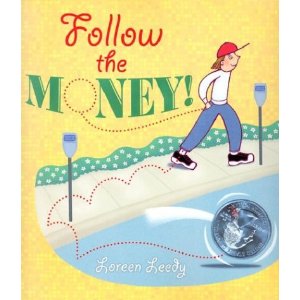
After counting money, we practiced counting money in story problems. This reinforced the meaning of money away from the strategy. I read Lorreen Leedy's Follow the Money to my students. The book is a little bit challenging, and parts were above many of them, but they really seemed to enjoy it and the concept of the book, that money is of a certain value and exchanged for a certain value, was simple enough for them to understand. The has great illustrations and helped us discuss some of the features of money more in depth.


After reading the book, we walked through a series of story problems I created to  reinforce that you pay money for something. I would tell the children to put X amount of coins on their board and count them. After we counted them, I would start a story and we would take money off of the board for each part of the story and recount. I also always made sure that the children were taking off the "best" way to make change (ex. for ten cents I would have them pull a dime over 2 nickels). I explained that when you make change or pay for something you typically want to use the fewest amount of coins possible. For example:

Miss Prinzo has 2 quarters, 2 dimes, 2 nickels, and 4 pennies. How much money does she have?
Miss Prinzo goes to the store and buys a pack of stickers for 30 cents. How much money does she have left? (we did this as a group so I would ask the children how we should make 30 cents, remove it from their board, and recount it for each step)
Miss Prinzo buys a notebook to put her stickers in. It costs 37 cents. How much money does she have left?
Miss Prinzo wants to buy an ice cream cone. It costs 50 cents. Can she buy it? Why or why not? How much more money does she need.


After we practiced as a group several times, I had the children work in pairs with manipulatives (coins), individually with manipulatives, and in pairs without manipulatives, and individually without manipulatives. Children who finished early were given the challenge of writing their own money stories (a document of this is in the link above). I picked one of these problems each day to write on chart paper and work through during our introduction time with whole group. This was an amazing motivation for the students. So much so that I ended up putting a few blank stories in our writing center for children to keep practicing with. 
Student work samples. The first image is the "money story frame" ( a brilliant story about Miss Prinzo and her trip to Walmart complete with the "Save Money, Live Better" logo) and the second image was of our first student authored problem. 

The assessment for my unit was accomplished over 2 days. During day one each student shopped at FroggerMart. This was a HUGE hit with my students. They were asked to pay for 2-4 items. With each item, they had to make correct change to pay me (or tell me why they couldn't) and then figure out how much they had left to spend and still could afford. The students did a great job with this...only a few needed teacher intervention for the task. This was definitely an activity that would need a few adult volunteers. We did it during half group time (only 10 students in the room) with two adults and it still took forever! I tried to group the students by the expected pace and ability level and eventually did 5 students at a time instead of the 3 I had intended.


I have to admit, I was REALLY proud of my students during the unit and after the assessment. They went well above grade level standards in this unit! I couldn't be prouder!

Tuesday, March 8, 2011

BANG!

One of the few things I learned from my Kindergarten practicum (other than how not to treat students) was a game called BANG. It is a really simple game that helps children practice sight words (and I taught the children how to play it using math facts). In the game you have some sort of flash cards. Take a few of the cards (about one for every 5 or 6 cards) and put a small sticker on it. After that you are ready to play!

The rules of the game are simple: You move in a circle. Each child is shown a card. If they say the sight word (or give the fact etc.) they keep the card. If they get it wrong, the next person gets a try until the card is taken. When you get to a card that has a sticker, you get a "bang". If you are right, then you can take a card from another players pile--but only if you can say the word/ give the answer. Play until the cards run out. The player with the most cards win.

Fair warning...you may want to change the name of the game (or get ready to hold in your adult humor)... because you will her things like...

"I am going to bang you!"
"Stop banging me!"
"She is banging me again!"

Monday, January 31, 2011

Geometry Unit

I finally finished my TPAC geometry unit. This was the first major unit I planned. We started planning for our unit during fall quarter. It was at this time that I realized that there was no way I could teach Geometry in only five days. My unit, the one that started as 5 days, was a full 2.5 week. Thanks to snow days and holidays, my unit took over three weeks. 

I could not be happier with the results of my unit. The really exciting thing about this until was that the majority of students had already met the 1st grade Geometry standards so my unit was almost all enrichment. I chose to focus on 2 main ideas:

(1) Identifying shapes by the number of sides and angles they have and
(2) Composing and decomposing shapes from other shapes.


Click to play this Smilebox slideshow
 
From a teaching perspective, I really tried to incorporate many different learning styles. We had hands-on activities, connections to literature, book study, and traditional worksheets. Not all of the lessons I taught were perfect, but I feel confident that they were effective and taught my students to look at shapes in a different way. 

Throughout this lesson I capitalized on my students love of reading by using children's literature to introduce and review many of the concepts in my unit. Dr. Seuss' The Shape of Me, The Greedy Triangle by Marilyn Burns, and The Great Shape Race by McGraw Hill were staples to introducing non-traditional shapes, using sides and angles to label shapes, and exploring 3-D shapes respectively.

One of my most popular activities was our shape hunt. The children split up into teams to find objects in the room that had either no sides, 3 sides (a triangle), 4 sides (quadrilaterals), or 5+ sides. This was a fun take on "write the room" and I loved the carry over between math and science. After the lesson I left extra scavenger hunt pages with a basket of picture books so the children could do a literature shape hunt when they finished their work early.

Additionally, as you can see in the slide show, I incorporated books about quilting into our CAFE (reading workshop) time. I also plan to continue the quilting theme by reading Sweet Clara and the Freedom Quilt during black history month. After reading the book, each child will add a small house to their quilt square. This house will symbolize a stop on the Underground Railroad similar to Clara's Quilt. 

I LOVED teaching this unit! I have 101 more ideas I could have incorporated, but good things come to an end and there is always next year! After we finished our assessment (twice, but that is another post itself), it was time to move on to our Money unit. 

P.S: My mom deserves a shout out for helping me cut 1,000 triangles for our class quilt over winter break. This is clearly why I went home :)

Sunday, January 2, 2011

Graphing!

I love graphing! It is one of my favorite things to teach. I love how many possibilities there are with this concept.  I also love that it is a concept that really grows with students. It is easy to see how the bar graphs we made in our preschool classroom are similar to the graphs we use in high school and college. Graphs are used in articles, magazines, and opinion polls...we see them everywhere! Maybe that is why I like teaching graphing so much---it is a skill that I know my students are going to use for the rest of their lives.

Graphing is also one of the concepts I have had the opportunity to teach in all of my practicum experiences (which might be another reason why I like to teach  it so much). Here is a run down of the graphing activities I have taught and how they grow at each level.

Preschool: Shoe Graphs

During my lead teaching week my focus in math was graphing. As a way to help students learn about graphs, we used a shower curtain and each morning at arrival the children in the class would take one shoe off and place their shoes on the graph. We would then talk about our graph during our first circle time. The focus was to graph by a different property each day (the graph for the first day, shown in the picture above, was to graph by color). This helped the children focus on identifying characteristics, classifying and sorting. We would talk about the basics: which category had the most and the least and how many shoes were in each category. At the end of circle time children would be dismissed by getting their shoes back...a relief for me because I got really sick of the "put your mat away" song!


Kindergarten: M&M Graphing

Any lesson that involves candy is an instant hit with students! Making them work before they can eat their candy it is a GREAT motivator. Every time I have used candy as a manipulative my students work really hard to stay on task so they can get my approval that their work is done correctly and FINALLY eat!

In this lesson, we practiced graphing with M&Ms. My main focus was to help the children learn how to represent a group of objects on a bar graph. It seems easy to us as adults, but children at this age sometimes have a hard time understanding how blocks on a page can really mean real-life objects. When they actually get to construct their graph using actual materials I think it makes the concept less abstract and easier to master.

I started the lesson by demonstrating how to construct a graph with the students. We followed these steps:
1. Separate the M&Ms by color (I bought a few large bags and separated them into ziplocks for my students...I did this opposed to fun size bags b/c I had more control of the contents. I used this as a way to differentiate instruction for the students).
2. Look at the graphing page and find the first color. How many do you have? (I pre-created the graphing pages for my students. We talked about all the parts of the graph during the intro to the lesson. I thought it would be too much of a task for the children to do the writing and graphing and post activity)


3. Count that number of blocks up. Put your crayon on the highest block and color down. (I always teach color down at the suggestion of my K mentor teacher--coloring down will help the children keep the children from accidentally coloring too far. It also helps for later when their bar graphs may not have grids. It also teaches them to look over to find out the value of the bar)
4. Repeat for each color

When the children completed their graphs they raised their hands. My mentor teacher and I would ask them a few questions (Which color did you have the most of? etc), check to see if they had made their graph accurately, and then let them eat their M&Ms.

After the children finished making their graphs, I wanted to reinforce looking at graphs and the data they contain. I created a short worksheet that they completed in pairs. This was a little tricky for them, but it really forced them to look at what their graphs represented and answer questions about it. Here is the worksheet:


First Grade:

We did a short unit on graphing before winter break. The unit focused more on the data analysis side of graphing rather than constructing graphs. I created one of the lessons in which we focused on why it is important to know the question that was used to collect the data.

I started the lesson by asking putting up a chart in with the categories video game, doll, puppy, book. I did not tell the children what the categories were for and asked them to mark the graph. One by one they came up and marked the graph. A few students caught on and asked me if they were supposed to mark their favorite and I would respond "whatever you think" which seemed to satisfy them. When they finished I asked them what the graph was about and I got all sorts of answers (favorite toy, what they wanted for Christmas were the most popular). After some of their answers I told them "Would you have answered the same if I told you this graph was the thing you would  NEVER be allowed to play with again?" and was almost blown out of my chair with their "NOOO!"s. This led us to the discussion that the question used to collect the data is really important.

Prior to the lesson I created a few different graphs with no titles that were all food related (desserts, entrees, drinks). I put up each one and had the children create questions that they thought the graph showed. I would select one of the answers as the "real" question asked. I made sure that one of the questions was "What is the ____ you liked the least"

After each graph had a question that showed what the graph talked about I paired the students up for this challenge: "Use the graphs to create the perfect meal for the students in this class" and handed each group a slip of paper to construct the meal. The students who finished early were asked to create a meal that you "absolutely would not want to give the class". This turned out to be a really fun way to help the students see how data can be used. It also was a good way to show "majority rules".


I am excited to keep exploring graphing with my students! The next stop in the graphing adventure will come during my Geometry unit...get excited!

Friday, December 10, 2010

Community Helpers Bingo

I have been reading a lot of blogs lately. I am addicted! There are so many great blogs by and for educators that I cannot seem to keep up. I started a folder in my documents for downloads from these sites about 2 weeks ago and it is already full! I have already downloaded about 30 different activities! My next big task is to organize them, but in the mean time I thought I would pay it forward so to speak.

Even though I am only a student teacher, I think I can contribute ideas and activities that other teachers can use. So here it goes: Community Helpers Bingo. This is probably my favorite lesson so far. My children LOVED it.

Materials and Directions:
- Print Bingo Cards. Each card has a combination of labeled community helper pictures on it. I put the cards in slip covers for durability (it is like cheap lamination!).The cards also have a full-page image of each community helper. I used these the first few rounds to help the children make sure they had the right answer to the clues.

- Give the children bingo markers. I used unit cubes because they are stackable and do not slide around easily.

- Print the Bingo Clues. I would read these clues and the children would be responsible for marking the corresponding clues on their board. I also supplemented the clues listed with images from community helper books we had read in class.

-Giving the clues: I would read each clue 2 or 3 times. The first few I called we discussed as a group. For the first few rounds I put up the corresponding full page picture. Then the children were on their own. I was pleased to see how well they worked with each other. They talked about their answers at the table and even helped each other find the pictures on their boards!

-Awarding prizes: I really did not want to emphasize the "winning" part. We would play until 3-4 winners called "Bingo". The first time a child won the game, I would check their board and give them a sticker. By the end of the lesson all of the children had won at least one game...I might have influenced the game a little bit and made sure certain helpers were called towards the end. I won't tell if you don't!

-Play, Play, Play! We played several rounds. We played lines, diagonals, corners, x's, T's, L's, and full cards. I drew a picture of what their card should look like on the board each time so the children could better understand what a "Bingo" looked like.

-Noise Level: This game was a little bit loud. I personally am not bothered by noise during games or activities. The children were really good about quieting down when I started to read the next clue, but you might want to use a timer or bell to transition between reading clues and looking time.

The children had such a good time with this activity, we left it out in our Science & Social Studies center for them to play independently.

Saturday, November 13, 2010

How INTERESTING!

As an ECE teacher, there will be times that things the children think our fascinating are 100% disgusting. As a science teacher, you might even be introducing this material. It is important to capture the children's fascination and help them learn from it. And they will notice if you are 100% disgusted and likely follow suite. One of my classmates had a great suggestion. Instead of saying "ewww" "gross" or "yuck" say "how interesting". Have the children do the same. Happy Science-teaching.

P.S...I wish I had this little trick in my bag when the naturalist from Hamilton County Parks came into the class with the snake.

Wednesday, November 10, 2010

Reading in Front of the Class

One of the things I have gotten much better at this year is reading in front of the class. I used to HATE reading to the class, or really reading out loud in general, because I read so much faster than I talk. The more I have practiced, the more I like it. I began to think of it as a way to model fluency and reading with expression and realized that if I focus on those things, just as we ask children to, I was a much better reader.

My students are a great audience and they LOVE books!We take full advantage of this and teach through our reading time as much as possible. Here is a list of things from the "Childhood 101" blog that are some basic ways for children to learn through story time. To see the full post click here.


1. As you read a new book, pause to make observations together or ask questions about what is happening in the story.
2. In picture books, illustrations are as important as words. Notice together interesting details or clues as to what is happening in the story.
3. For older children, ask what they think will happen next or what they would do if they were in a similar situation.
4. At the appropriate moment, pause as an invitation for your child to join you in reading a rhyming word or familiar phrase.
5. Ask your child to point to where the words are on a page (as separate to the illustrations). Talk about the words being the part of the book which you read.
6. Point to the words as you read them. This will show your child where you start reading, that you read English from left to right and that there is one word represented on the page for each word that you say.
7. When re-reading familiar books, point out (or ask your child to point out) any letters which are significant to them, for example, the first letter of their name.
8. For older children, notice punctuation marks, such as full stops, question marks and exclamation marks.
9. Explore the end pages of the book. SquiggleMum posted about the purpose and possibilities of end pages here.

Explore the Cover: (original post)

1. Read the title of the book. You might like to point out the words which make up the title with your finger.
2. Read and point out the name of the author.
3. And the illustrator.
4. Point out any letters which are significant to your child, for example, the first initial of their name.
5. Before reading a book for the first time, look at the cover illustration and talk about any clues you can see which might help you both to understand what the book is about.
6. Look at the spine of the book - point out the title and talk about why a book has a spine, SquiggleMum has a great post about book spines here.
7. Use the correct vocabulary - cover, title, author, words, illustrator, illustrations, spine.
Whilst you might not do all of these things every time, taking time to explore the features of the book cover helps your child to;
  • Build prior knowledge of what the book is about
  • Make predictions
  • Set the purpose for reading
all of which are important, especially when it comes to comprehending what you (and later they) are reading.


Hopefully I will get a chance to post some specific lessons we have taught or introduced through stories, but what I like about these tips is that anyone can implement them and when done in moderation, the children won't even notice they are learning!